If you're looking to create a professional looking print for the very first time, or are just toying with the idea of screen printing then congratulations, you have come to the right place. As an established supplier of screen printing equipment for schools, colleges, universities, art studios, and retailers, we know a thing or two about printing great designs onto a variety of canvases.
If you are new to screen printing, the long and short of it is that screen printing is the best way to print onto cloth and paper. Not only does it produce the most vivid colours when done correctly, but it is also the most durable and immune to fading and cracking due to washing. Once more commonly known as silk screening, the process of transferring designs onto material has been modernised with nylon and polyester mesh. Nylon and polyester offer a tighter mesh when stretched over a frame, and subsequently allows a more precise and vibrant print than traditional silk.
Before starting, please make sure you have a degreased screen; this ensures that the emulsion we'll add later sticks well. To degrease your screen, simply run water over the mesh and spray a small amount of degreaser on, then using a clean scrub pad or brush scrub from top to bottom on both sides of the screen.
Screen Printing Guide
In this guide, we will assume that you have already selected a design to print and material to print on. If you haven't, do that now and come back!
Step 1
Emulsion Coating
The emulsion is photosensitive so it is best to apply it in darkroom conditions.
The very first step in the screen printing process is coating your screen with emulsion. With the frame standing up, resting against the wall and the print side facing out apply a generous amount of emulsion to the mesh and spread using the coating trough. You want to ensure an even coating here, and you are looking for a thickness about the same as the mesh itself. Remove excess emulsion and coat the reverse side of the mesh in the same way. You will have just completed a one on one coat which is perfect for manual screen printing.
Store the coated frame print side down on a drying rack so that the emulsion is pulled through the mesh.
Step 2
Creating the Film
The next step is to create your artwork or design in film. (We stock A4 and A3 film in our online store). Print your artwork in black onto the film, whilst leaving the rest of the film transparent. It is very important that the black artwork on your film is dark enough to not let light through. You can easily test this by holding it up to the light. If the light does pass through, your final print may have bleeding colours. You can easily reprint over your current copy if it isn't dark enough to save wastage.
Step 3
Exposing the Film
Lay your film on the screen and place the whole thing under a light source to burn the design onto the screen. What we are doing in this step is hardening the emulsion surrounding the design, whilst leaving the design area unexposed. The length of time this process takes varies depending on the strength of your light source.
Once you are satisfied that the emulsion has hardened in all the right places take the film off and wash the soft emulsion off the screen. What you are left with is an area of hardened emulsion blocking the mesh, and your design stencilled into the mesh.
Step 4
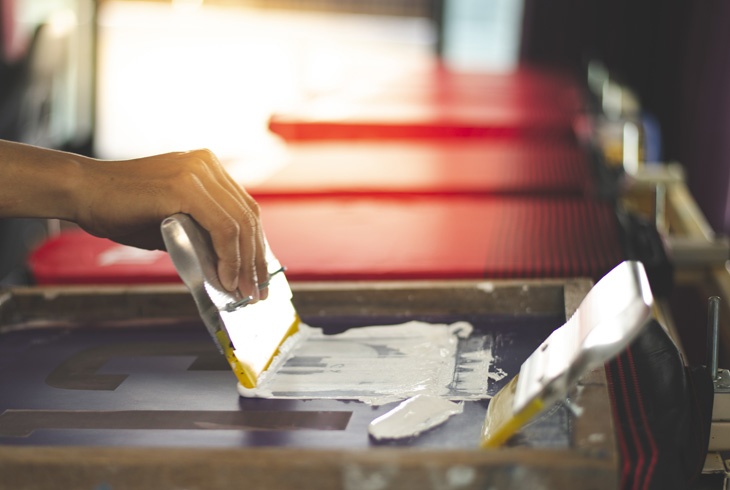
Screen Printing
We are now ready to start printing. On a secure surface, place the material you wish to print onto, and then place the frame over the top. Apply plenty of ink onto the top of the mesh ensuring that a dollop of ink stretches as wide as the design. Using a squeegee drag your ink over the design ensuring you apply enough pressure to push the ink through the small mesh. Remove the frame from your almost successful print and scrape the excess ink together for future use.
Step 5
Curing the Design
With all that excitement over comes the slightly boring but completely necessary part. Skipping this step, or not giving it the attention it deserves will mean your colours washing out, fading, or cracking over time. Curing is the chemical bonding process between the ink and the material being printed on. When it is heated to high temperatures, the pigment in the ink bonds to the fabric, and the water evaporates.
There are many ways of curing your print, from a Drying Tunnel to Flash Driers, but these are expensive to purchase especially if you are just starting out. Alternatively, you can buy a heat gun. Whilst not 100% effective and will take some time to master, the heat gun will allow you to cure small designs quickly. Purchasing an infrared temperature will also help you achieve the best results and ensure that the temperature of the ink hits the optimal curing point.
Despite what you might see on YouTube, curing your design in the oven is not sensible and absolutely not recommended!
Step 6
Cleaning the Frame
Make as many prints as you wish with your frame and design, but once finished scrape the excess ink off. You can then use a stencil remover to clean the screen completely and get it ready for a brand new print. At this point, you are back to the very first step!
You should now have your very first print, congratulations!
If you are new to screen printing and are not sure how or where to purchase the emulsion, or the frame, or the mesh, or the... check out our screen printing kits which have all the supplies you need to get you started!
Click here for screen printing kits.
How To Get Started With Screen Printing
in General Blog Tuesday, October 8, 2019